Ep.87- How To Track Spending with Mint
📸 IG handle: DollarSenseLA
Read Time: 5 Minutes

I was once told that if I wanted to know what a person cared about, I should look at where they spend their money and where they spend their time. In reality, many people don’t know exactly where they spend their money. Today, I am going to show you how I track my spending via a free tool called Mint, and how I make sure my spending is aligned with my priorities.
WHAT IS MINT?
Mint is a free online tool (and an app) that helps you track your spending with ease by linking all your accounts into one place. It is owned by the same company that makes Turbo Tax. With this tool, you can easily find out whether you spent $200 or $800 on eating out last month.
I highly recommend setting up Mint from from a laptop initially and then use the app afterward, because it’s just easier to do the setup on a computer. Personally I have been using Mint for over 5 years.
HOW TO GET STARTED

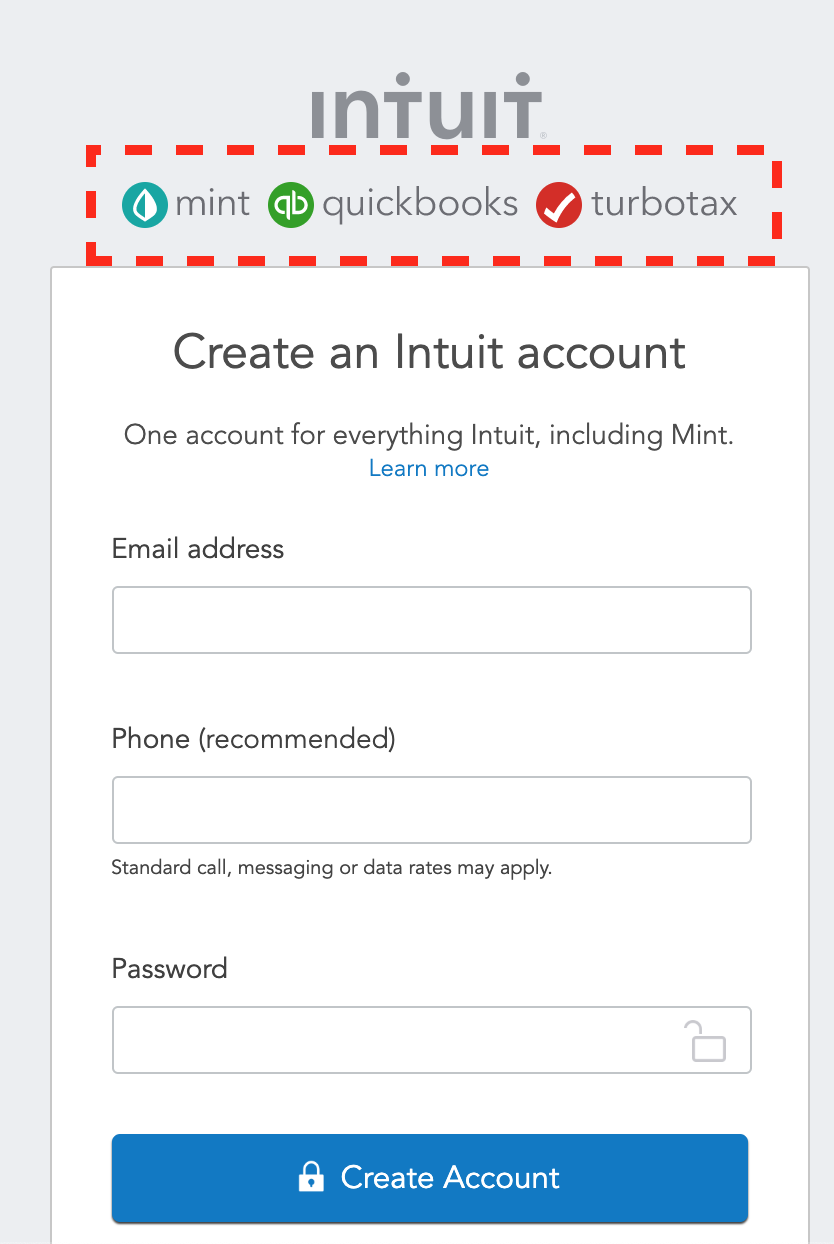
Step 1: Sign up - Go to Mint.com and click on sign up in the upper right corner of the page. From there, it takes a few seconds for you to fill out the form to create an account. Since Mint.com is owned by Intuit, who also owns Turbo Tax and Quickbooks, you can also use your existing login if you already have another account with one of their products.
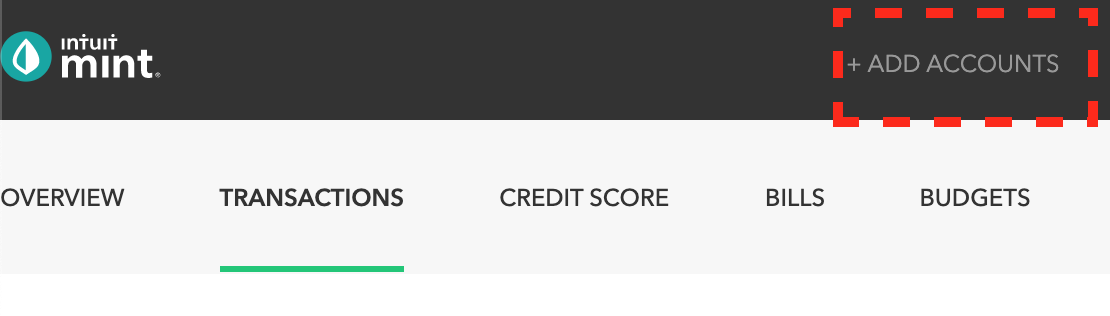
Step 2: Gather Your Accounts: After you have created your Mint account, you need to link all your financial accounts by clicking on the “+Add Account” button at the upper right corner. Before you actual do it, you should first write down all the accounts you do have, and try to remember your login and passwords. Here is a comprehensive list.
All Bank Accounts: This means your traditional banks, such as Wells Fargo, as well as credit unions. Link all your banks associated with your checking, savings and credit card accounts.
Retirement Accounts: For example, this could be your Vanguard, Fidelity, Robinhood or any other brokerage account.
Mortgage Account: Sometimes your mortgage account may not be the same as your bank account, you should link it as well.
Student Loan Servicer: For example, this is Naviant for most student loan borrowers if you have federal loans.
Offline Accounts: The two main offline accounts are the value of your home and your vehicle, as they are typically two of your most valuable assets. I recommend adding them as well. Detailed steps are explained in Step 4.
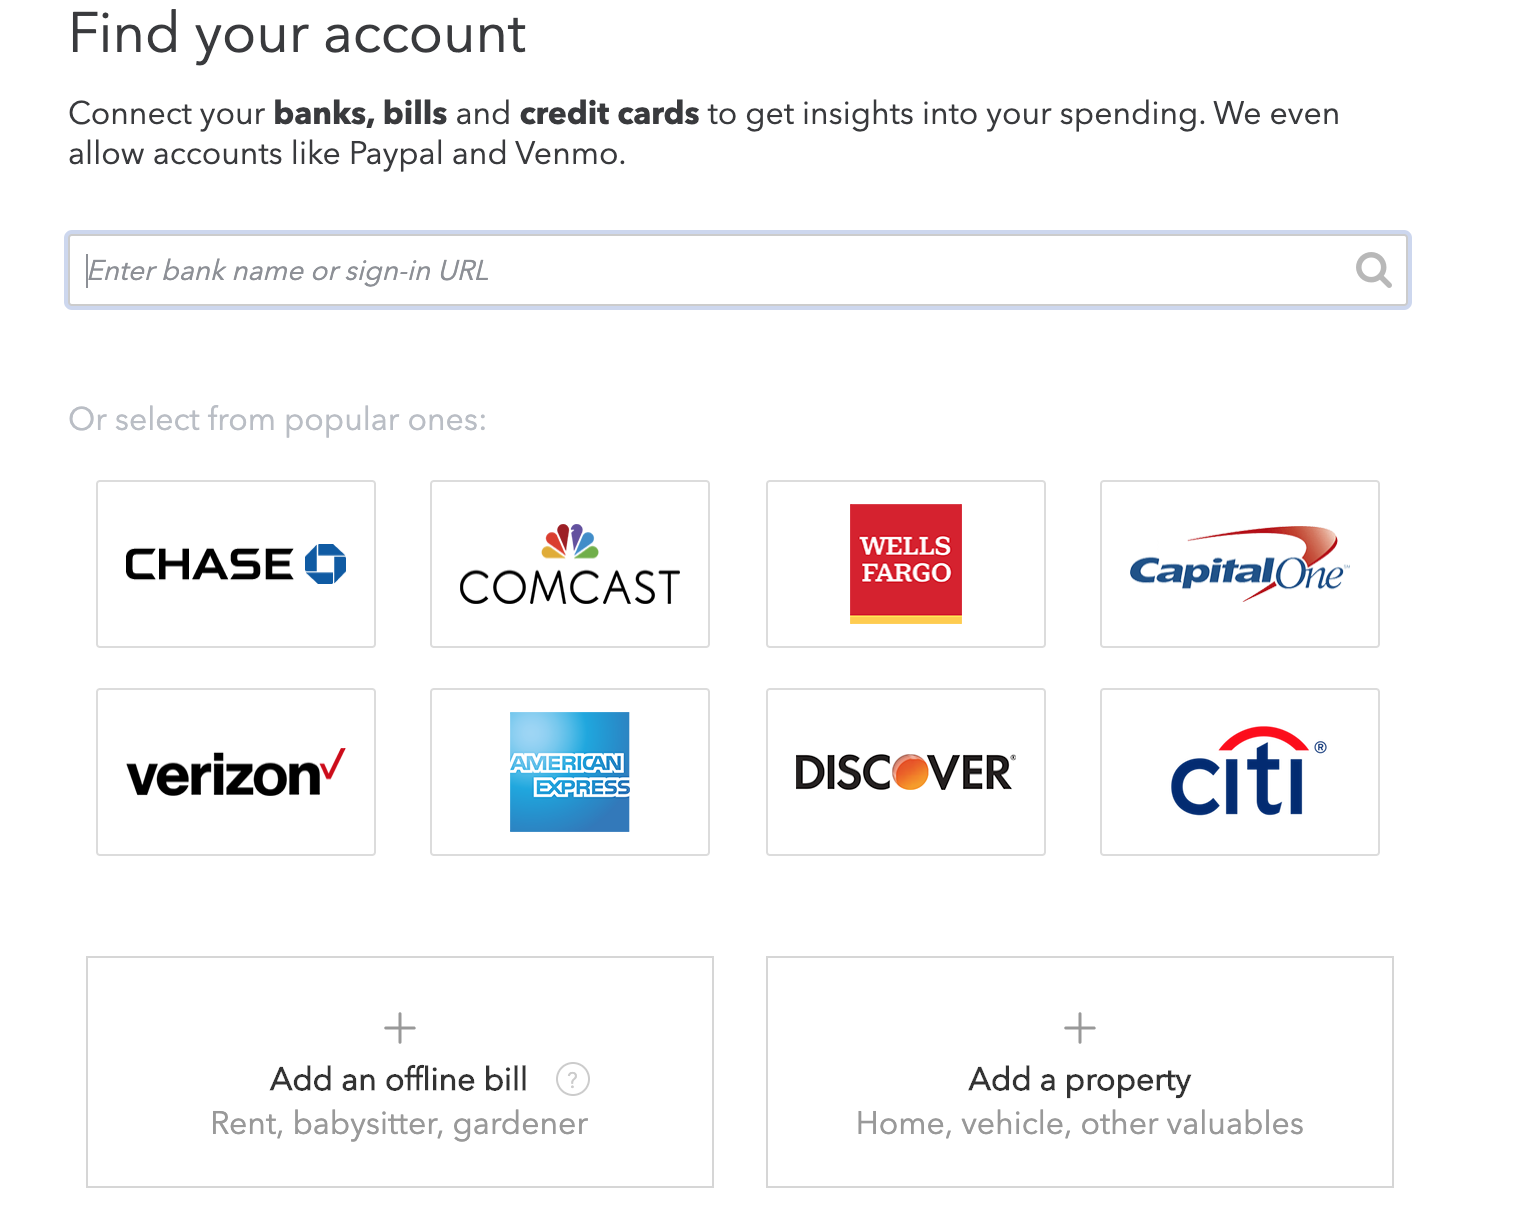
Step 3: How to Link Online Accounts (#1-4 from Step 2): In the search bar, you type the name of your bank, for example, Bank of America. Once you find it, you simply follow the steps, which means typing in the login information you use to access the account. You simply repeat the process of search and log-in for all your accounts.

Step 4: Manually Enter offline Accounts (#5 from Step 2): The most common types of offline accounts are the value of your home and cars. If you own a house or a car, you would want to manually enter them. Here are the steps:
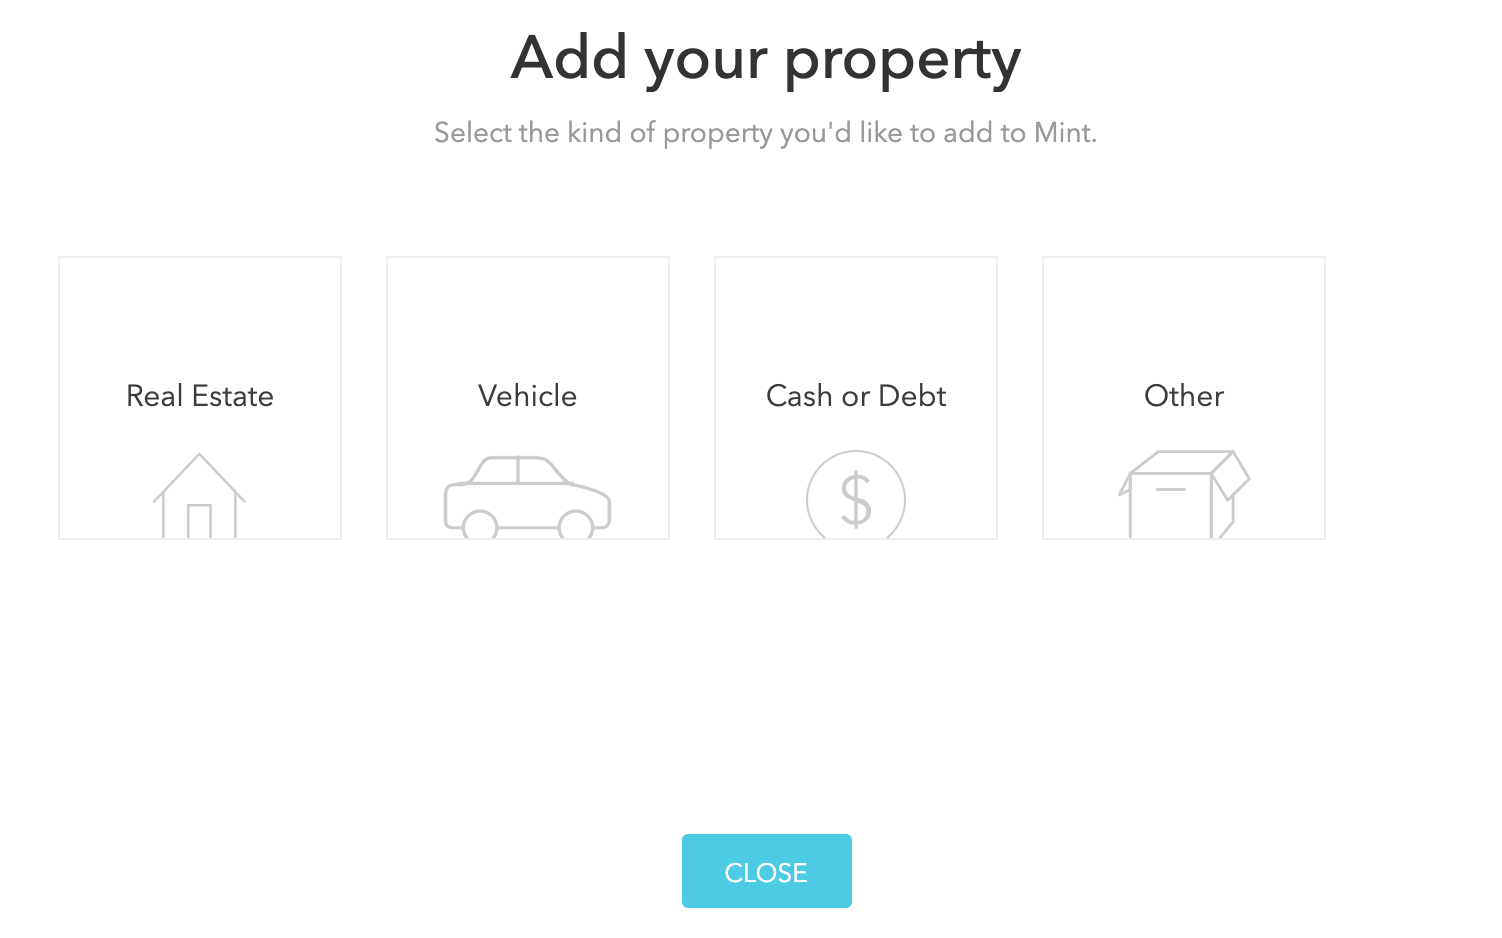
Click on “Add a property”.
If you have a house or a vehicle, click on the corresponding icon. I am going to use “Real Estate” as an example below. The process is identical for a car, where you just choose “Vehicle” instead of “Real Estate’.
For a house, follow the prompt, it will provide you a value from Zillow, which isn’t always accurate. I recommend choosing “Enter my real estate value manually” instead. It’s more accurate to use the value from Redfin or your actual appraisal done by a professional if it is ordered within a year.
After clicking on “Enter my real estate value manually”, you can give this home a name, for example “Ryan’s Primary Home”, and then link it against a mortgage account, so the system understands your $500,000 home has a mortgage of $400,000. In order to link against a mortgage, you need to add the mortgage account in Step 3 first.


REVIEW HOW MINT CATEGORIZES YOUR SPENDING
After linking all your accounts, Mint syncs them in real-time and categorizes each spending item automatically. The categorization is pretty good, but not 100% accurate. For this reason, you need to manually review the categorization. If you don’t do this, your vanilla latte from your local coffee shop, by the name of “the Boy and the Bear”, could be mis-categorized as Children’s Toy instead of coffee.
Here are the steps to review the spending categories:
Click on “Transactions”
Manually review the “Category” column to ensure the spending in each line makes sense to you. For example, if the $24,36 spending on Amazon is correctly categorized as “Shopping”, I would leave it alone. If it had been categorized as “Restaurant”, I would then correct it by clicking on it directly, and select the correct one from the dropdown provided by the system.
Go through the last 3 months of spending to make sure all spending items are accurately mapped to the correct category. I know it’s can take up to 30 minutes. But you need to make sure it’s accurate, otherwise it’s garbage in garbage out.


ANALYZE YOUR SPENDING TREND FROM the LAST 3 MONTHS
Now you have linked all your accounts, and manually went through the categories, it’s time for you to analyze your spending habit. Here are the steps.
Step1: Click on “Trends” at the top, and then “By Category” on the left

Step 2: Manually change the dates to the last 3 completed months. Choose “Custom” from the time filter named “During”. For example, if I am currently in January 2020, the last 3 completed months are October, November, and December. I recommend 3 months of data instead of last one month because the monthly average from the last 3 months is less susceptible to one-off behaviors, such as Christmas shopping, or a $300 anniversary dinner. As a result, the monthly average is a better gauge of your finances..

Step 3: Review each category in the pie chart and divide by 3. Your spending is now calculated automatically and presented in a pie chart. But you need to divide the number by 3, because the $ amount represents 3 months of spending. For example, if the data show you spent $1,500 on “food and dining “ over the last 3 months, it actually means, on average, you spend $500 per month.

Step 4: Double click on the pie chart for details: Once you see the number, you may have questions, such as “did I really spend $1,500 on food and dining.” If so, you should double click on the pie chart to review what exactly you spent on item by item. It could be a categorization issue, or it could be the truth. For example, I personally spent $5.46 on coffee on 12/23, along with many other things.

3 KEY CATEGORIES TO MONITOR
Out of all the categories from Mint, there are 3 categories you should pay close attention to, because they tend to be large amounts where you can make quick adjustments to have an immediate impact on your finances. These categories are:
Food & Dining: Review this category often, because like it or not, you are likely spending more than you think.
Shopping: Online shopping, especially Amazon, is so convenient nowadays it actually encourages people to spend more. If you spent a lot more than you think, consider returning anything you don’t use.
Subscription Services: Many of us have subscription services from a long time ago we forgot to cancel. Tracking your spending with Mint can uncover that old subscription service you have not used for years. Maybe it’s time to cancel it?